
This “Sourdough 101: How To Make a Starter & Bake your First Loaf” page is a constantly growing and evolving page to consolidate all of the information I’ve learned over the past two years about sourdough.
I’ve looked at a lot of resources including books and websites to learn about sourdough. My favorite is The Perfect Loaf.
Sourdough 101: How to Make a Starter:
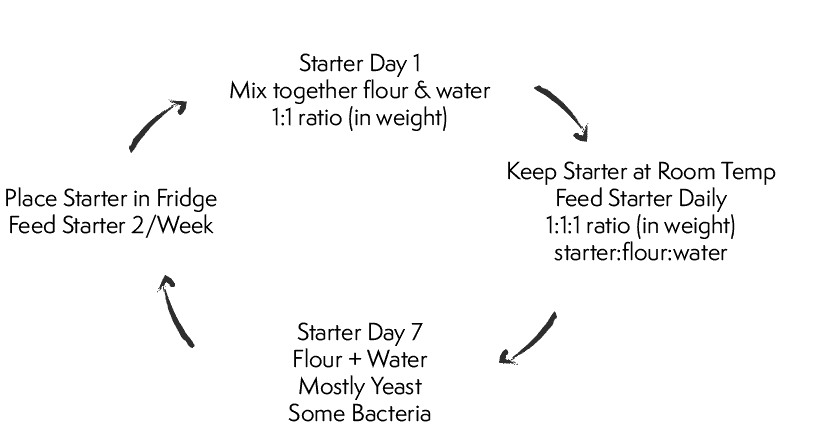
The first step? Learning how to make a starter. Making a starter can run the gamut in being fun or frustrating. My biggest recommendation is to stay consistent, observe frequently, and be patient. It takes a minimum of a week to grow a starter. Follow the general cycle below. Once you have a successful starter, it is much easier to maintain. In the very beginning, it can be a bit trickier. I’ve found that keeping the starter in a slightly warm place is helpful and more importantly, you may have to feed the starter twice a day.
Before the Starter: Weigh the empty jar you plan to keep the starter in.
Day 1: Add equal weight of flour and water in a small jar (ex: 30g each). Stir until combined and let sit out, covered with a paper towel (you want a cover that’s slightly porous so air can get in).
Day 2: Feed the Starter– Weigh the jar + the starter (then subtract weight of empty jar to calculate total weight of starter). Scoop out the starter until you have only 30g of starter in the jar. Then add in 30g of water and 30g of flour to the starter. Mix to combine.
Day 3-7: Repeat step in day 2. If you notice that the starter rises and falls quickly, feed the starter twice a day.
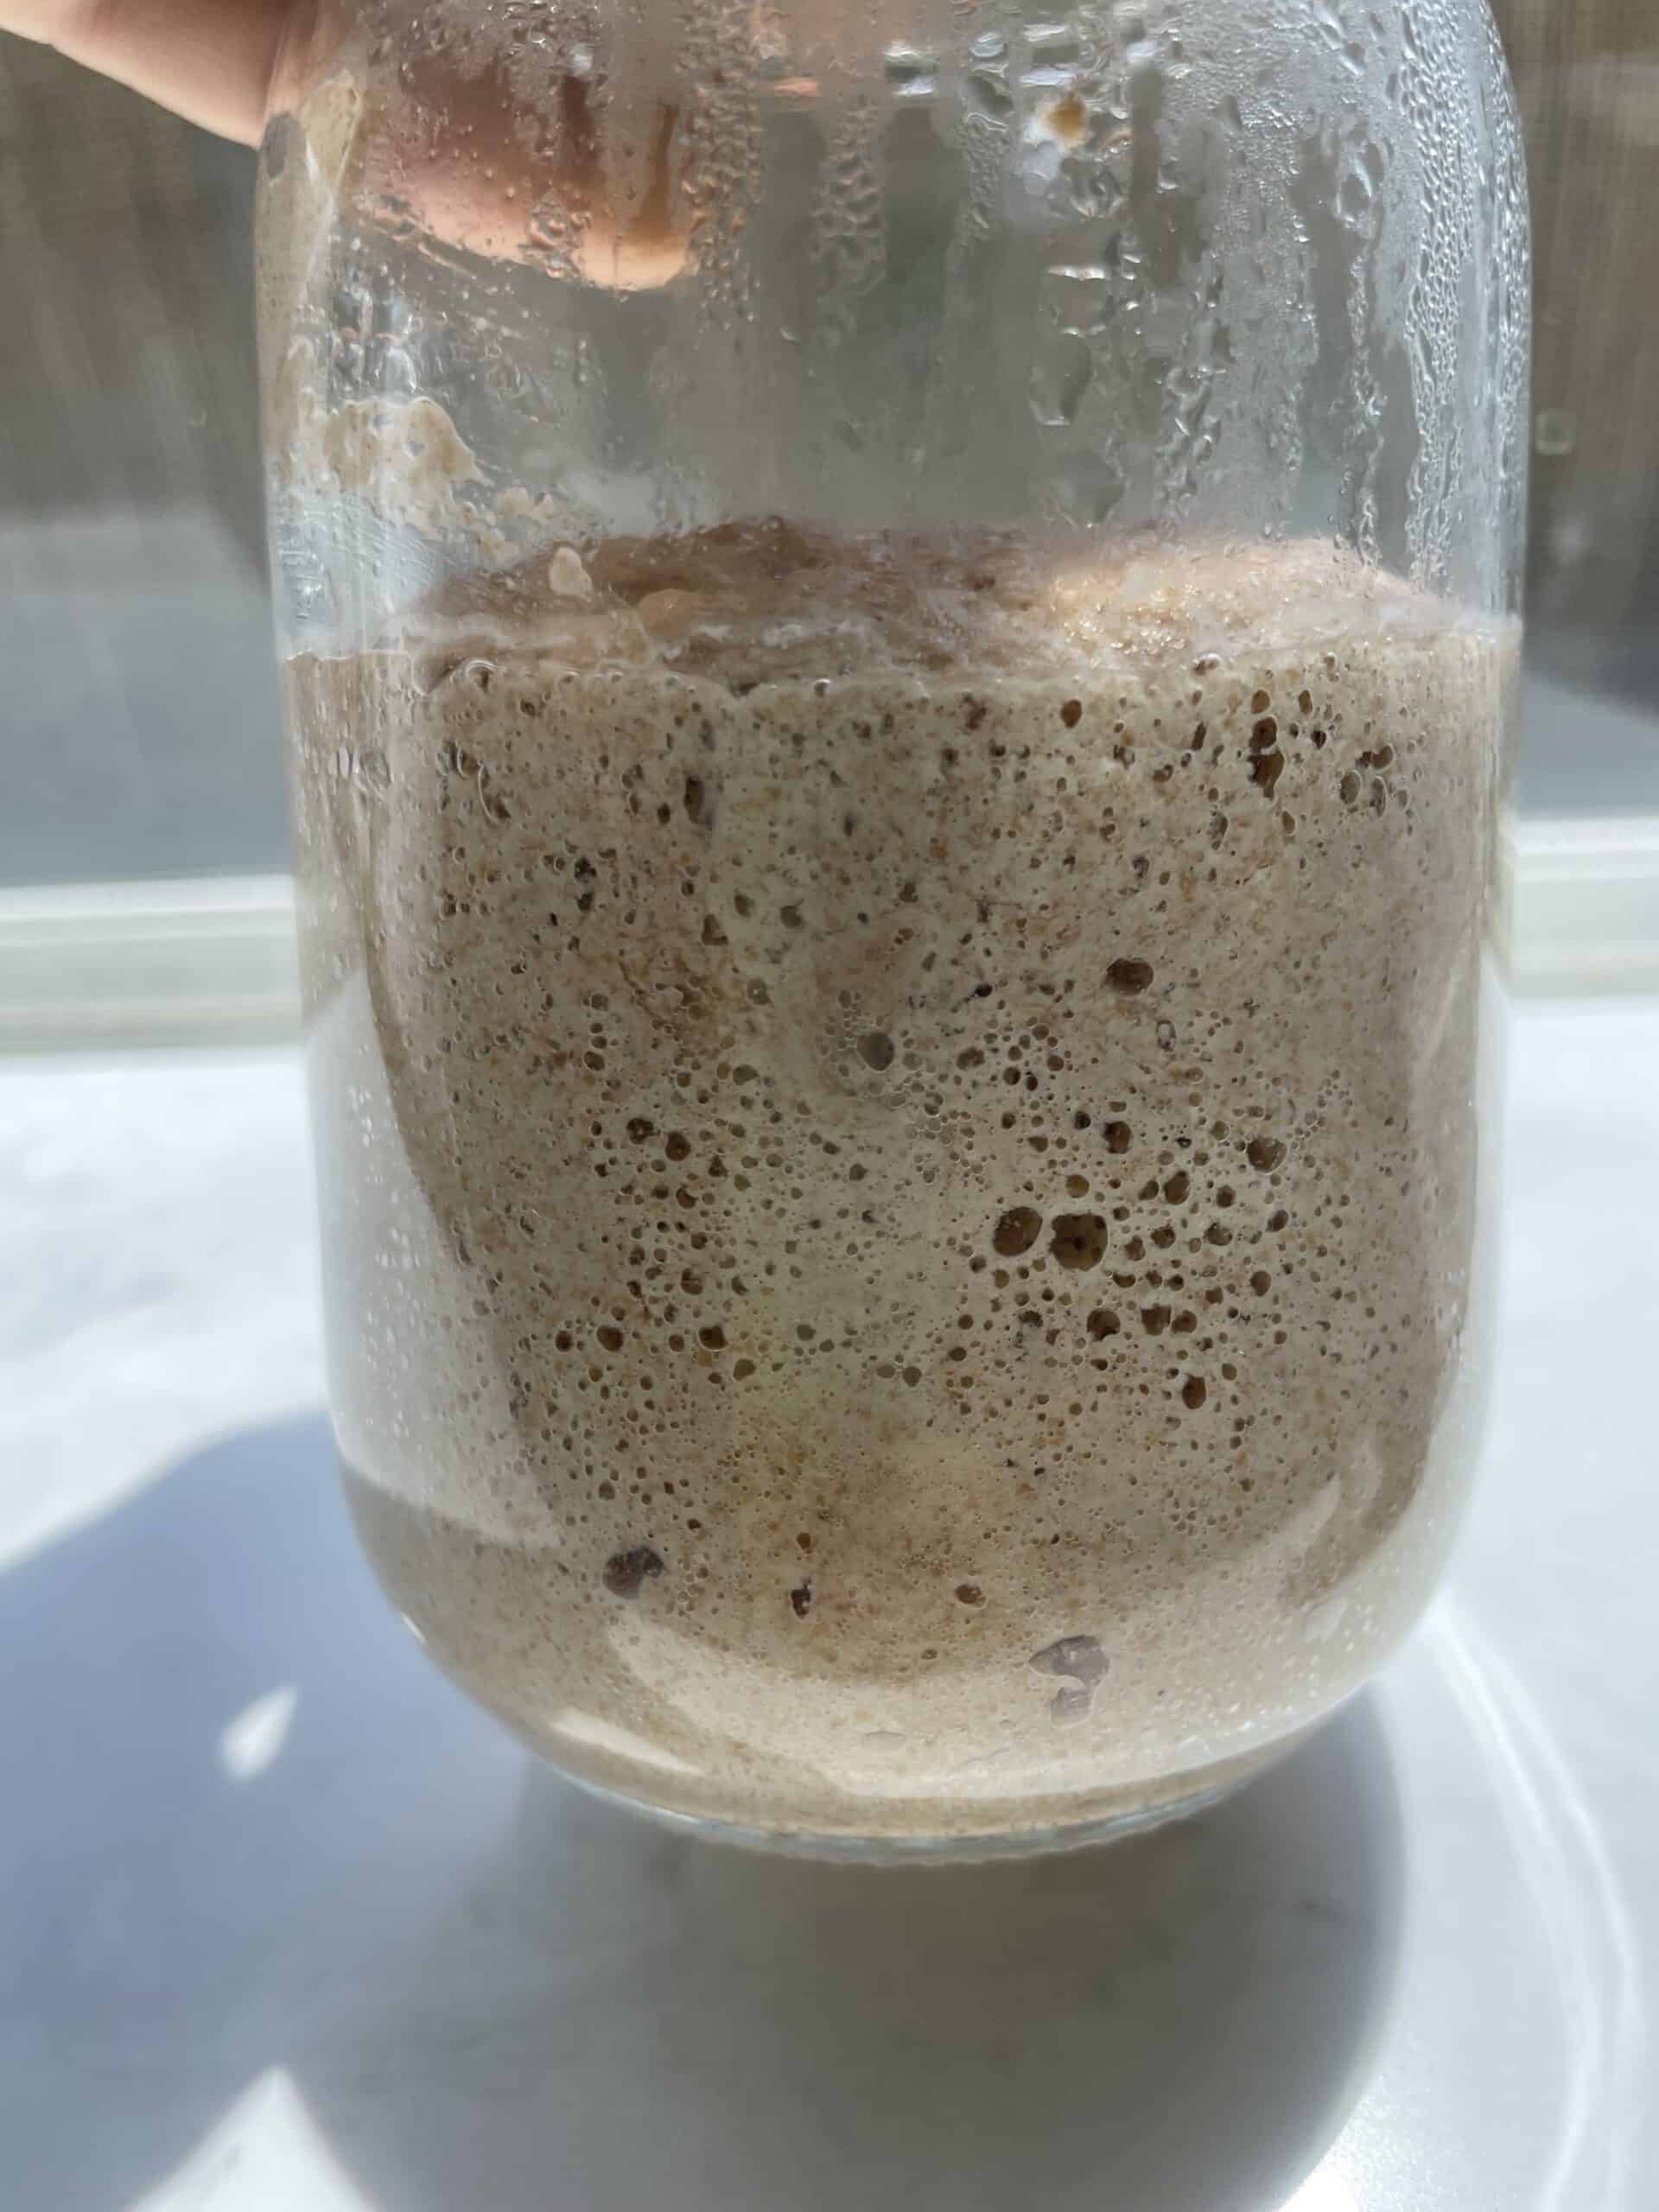
Day 8 and beyond: Once you have noticed that the starter has regularly begun to rise and fall throughout the day and you’ve noticed bubbles like you see in the right hand picture, the microbiome community is somewhat regulated. At this point, I like to put it in the fridge. This slows down the process and enables you to feed it about once to twice a week.
Ready to Bake? You’ll want to use your starter at its peak rise. Technically this is called the “levain”- essentially this is just the starter that you plan to use in your loaf. If you’ve been storing your starter in the fridge, pull it out a day before so it normalizes at room temperature before using.

Unhealthy starter: no bubbles, excess liquid, smells acidic 
Healthy starter (at peak rise): lots of bubbles!

The Science Behind the Starter:
What’s going on and how does this starter grow out of a simple combination of flour and water? It’s all due to the seemingly invisible naturally occurring yeast and bacteria that are all around your kitchen. These microbes collect onto the starter because flour provides food. Water helps break down the flour into smaller molecules (like glucose) that can be digested by these microbes. Overtime, a community of different species of yeast and bacteria live inside the jar.
The bacteria and yeast undergo cellular respiration, consuming the glucose from the flour and producing carbon dioxide and either ethanol (yeast) or acetic acid (bacteria). We observe this process through the rise of the dough and the bubbles present in the dough (an indicator of carbon dioxide) and the slightly sour smell (due to the alcohol and acid). The pH of the starter is also slightly acidic, usually around a 4.
The acidic environment created by lactic acid bacteria is crucial because it creates an environment that is too acidic for harmful bacteria to live in.
However, too much of this bacteria also becomes a problem. When not fed enough, the bacteria take over the starter and outcompete the yeast. This result in an overproduction of alcohol, which is produced by the yeast when fermenting the acetic acid produced by the bacteria.
Sourdough 101: Baking your First Loaf
Watch this video for a walkthrough in how to make bread once you have a successful starter.
The Science Behind Baking a Loaf
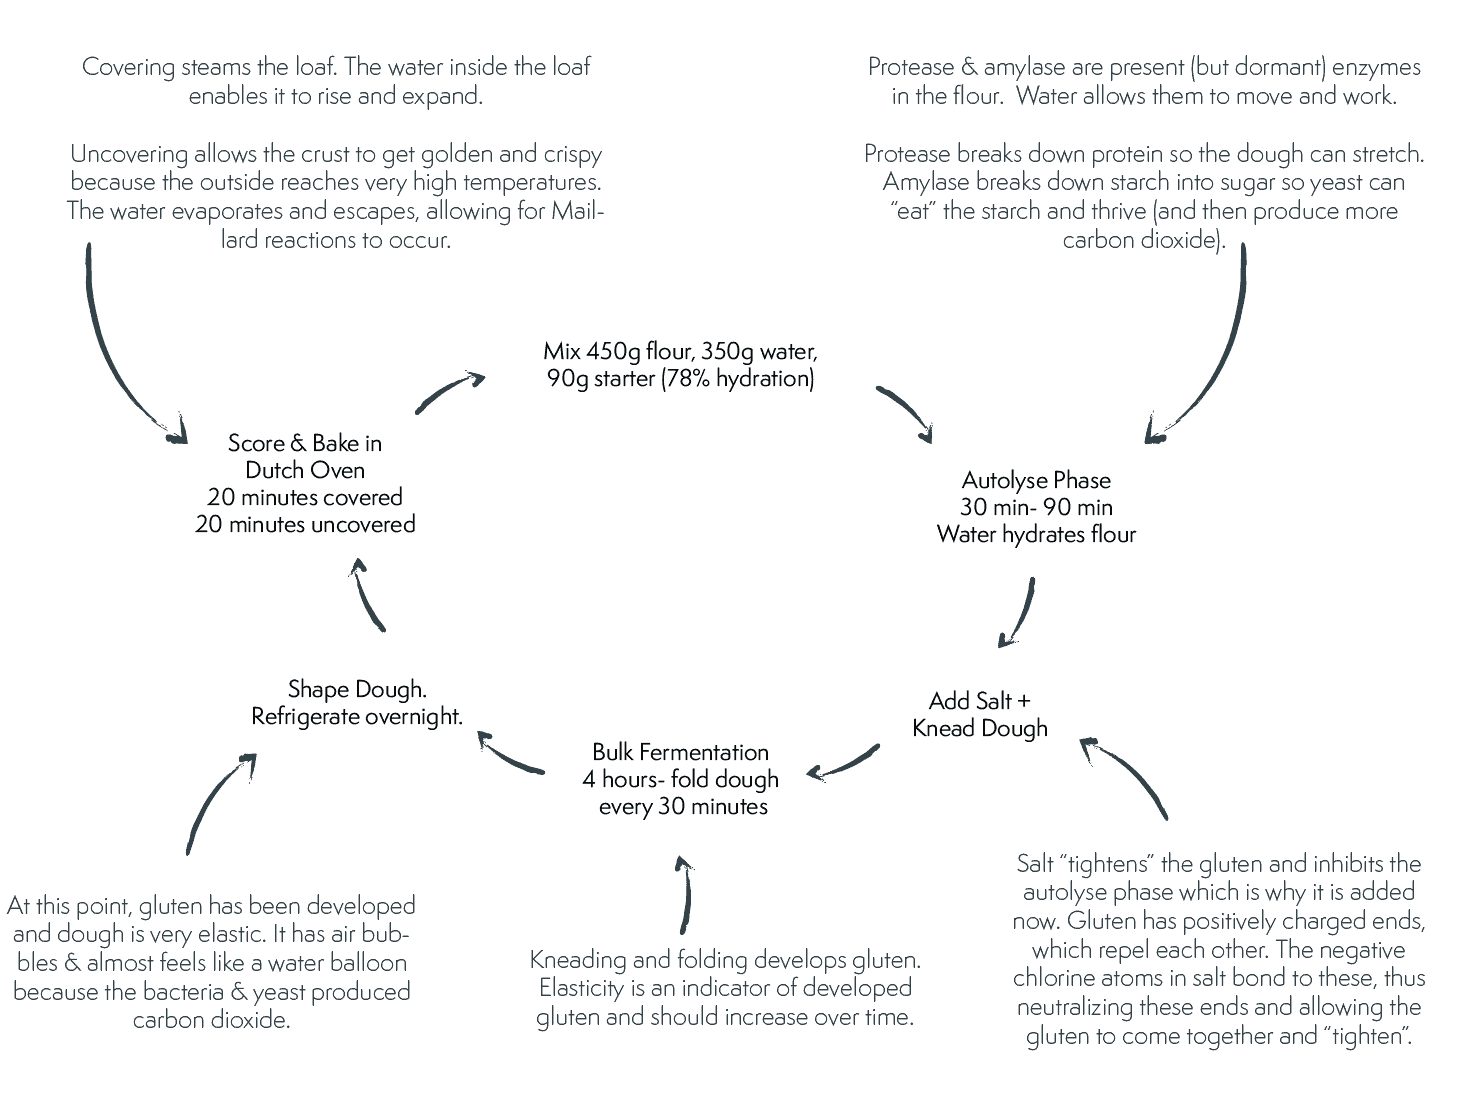

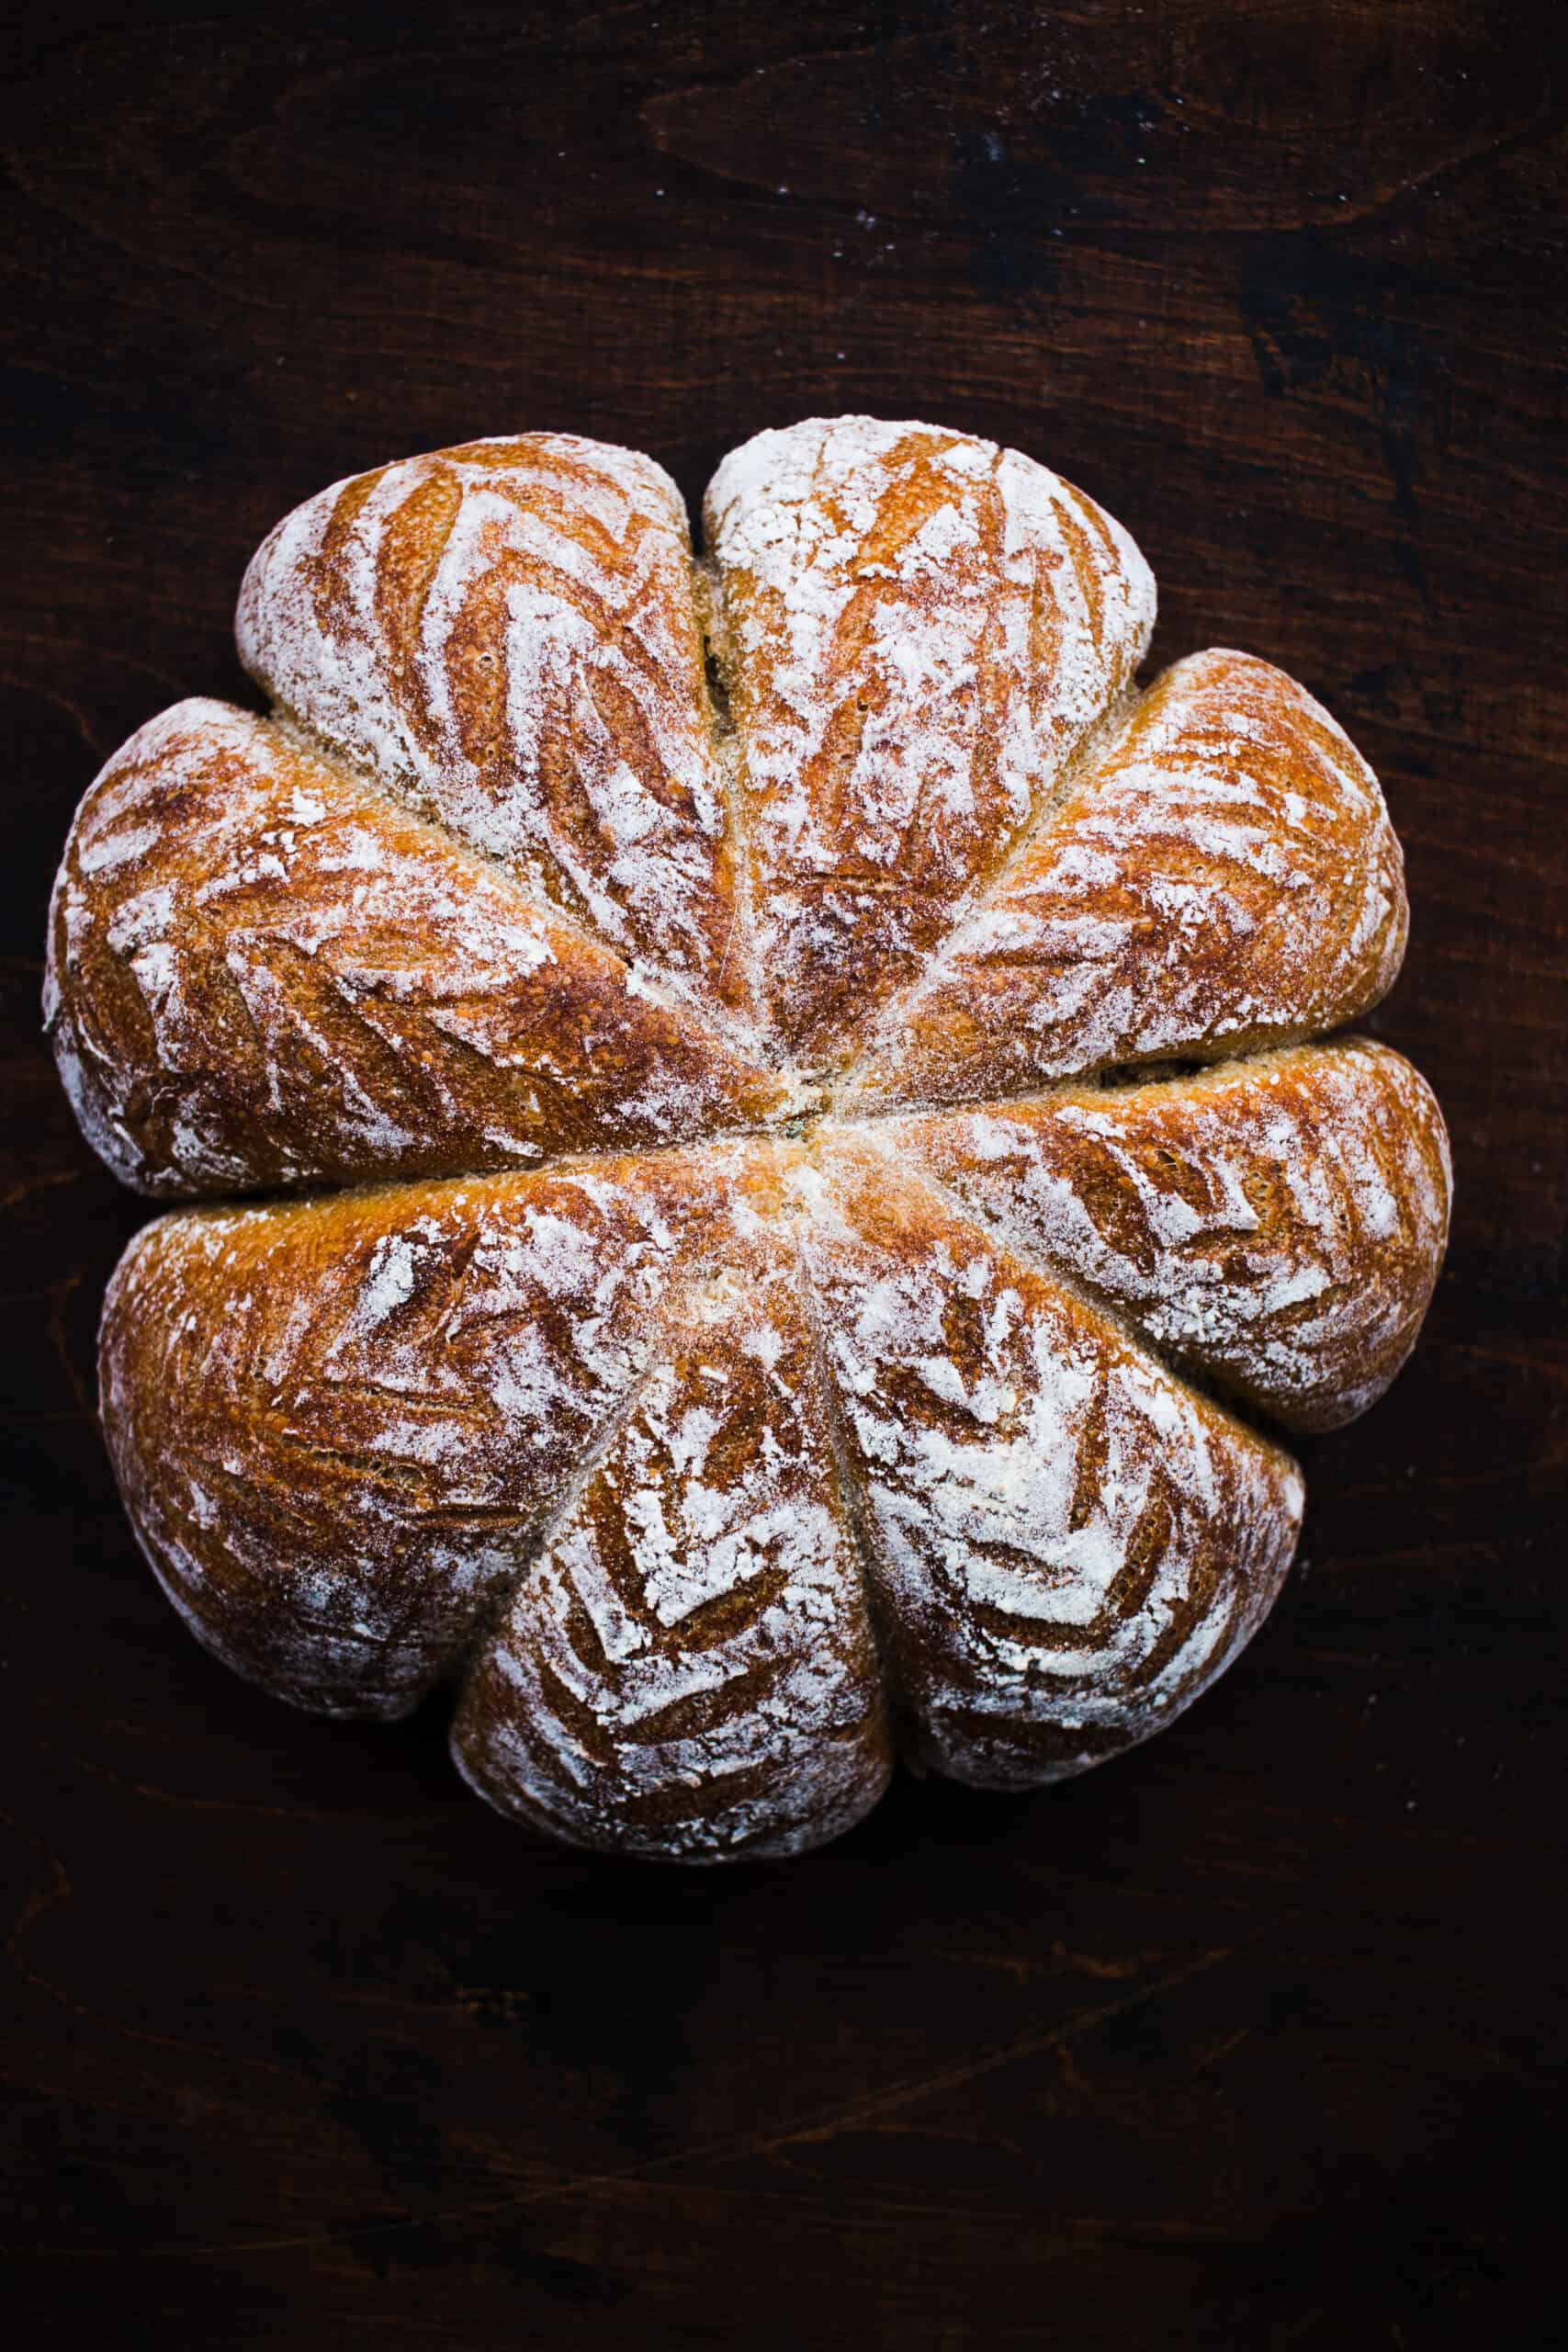
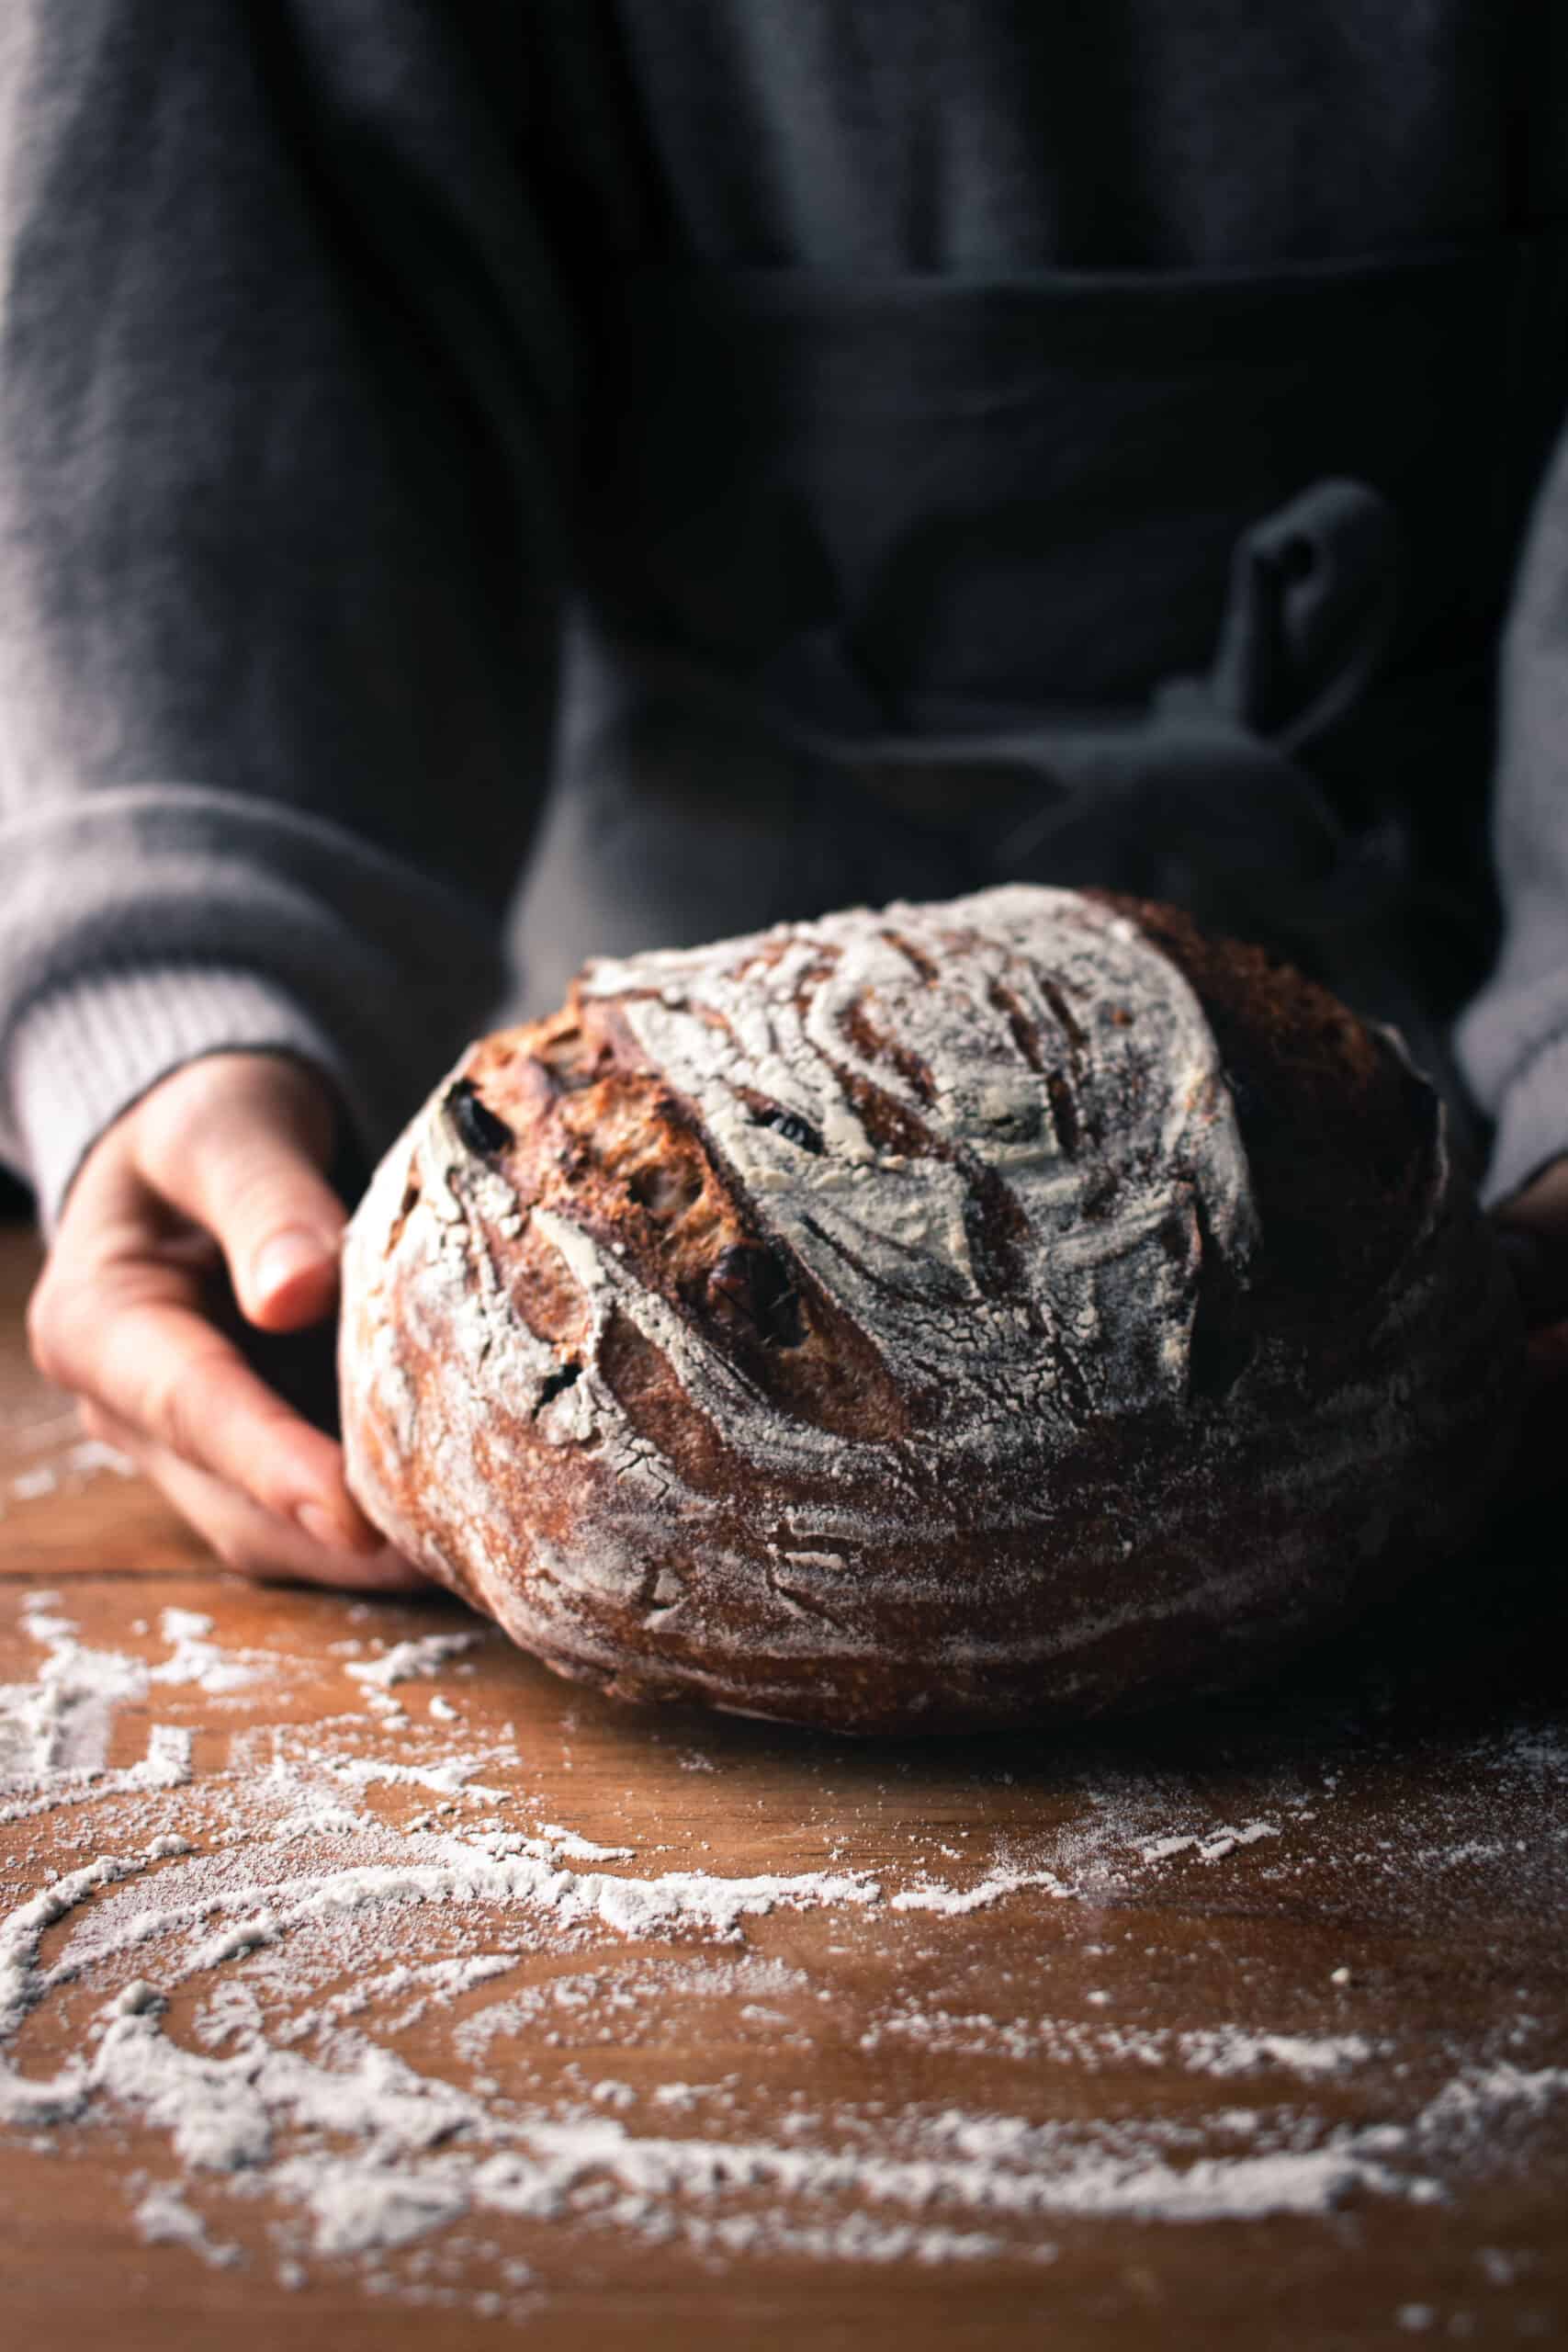
Whole Grain Sourdough Loaf
- 453 g total flour (see below for how I divide)
- 175 g whole wheat flour
- 225 g all purpose flour
- 53 g rye flour or buckwheat flour
- 350 g water, (78% hydration) (may need 25g more water at later step)
- 9 g sea salt
- 90 g starter
Optional Add Ins:
- 1/2 cup walnuts or pecans
- 1/2 cup raisins or cranberries
- Combine flours and water in a very large bowl. Begin with a spatula and then eventually use your hands to fully combine. Let sit, covered lightly with a paper towel, for 30-60 minutes.This is the autolyse period- this needs to be longer for whole grains; just AP flour and this could be done for about 30 minutes)
- Add in salt and any more water if needed. The dough should be supple and not dry.
- Bulk Fermentation: This next step takes 4 hours.For the first two hour, every 30 minutes, fold the dough.
- Place in fridge overnight.