
This Healthy Peanut Butter Twix Bars post has been updated in August 2021.
It’s been a year and a half since I’ve posted these and it’s safe to say these Healthy Peanut Butter Twix Bars are still a favorite of mine. I got into a routine of making these about once or twice a month, all for myself. It was just the right frequency to allow me to pull one (sometimes two) out of the freezer each night. Once I ran out, I’d make more. After making these so many times, I’ve made some small improvements from my original 2020 recipe to make the process smoother and final product better.
Original Post: I’ve seen many different versions of these bars on instagram for the last few months- and there’s a reason they’re going viral: they’re DELISH and surprisingly easy to make. Additionally…
- You can freeze them! Put a whole batch in the freezer and have a quick, healthy-ish dessert that’s already portioned out whenever you want.
- They are high in fat and low in carbs/sugar. The main ingredients in these are coconut flour, almond flour, and nut butter. You can make them lower in sugar if that’s what you’re looking for- see my notes below.
- You can make this with literally ONE bowl and ONE pan. Cleaning is SUPER minimal.
Behind the Recipe: Healthy Peanut Butter Twix Bars
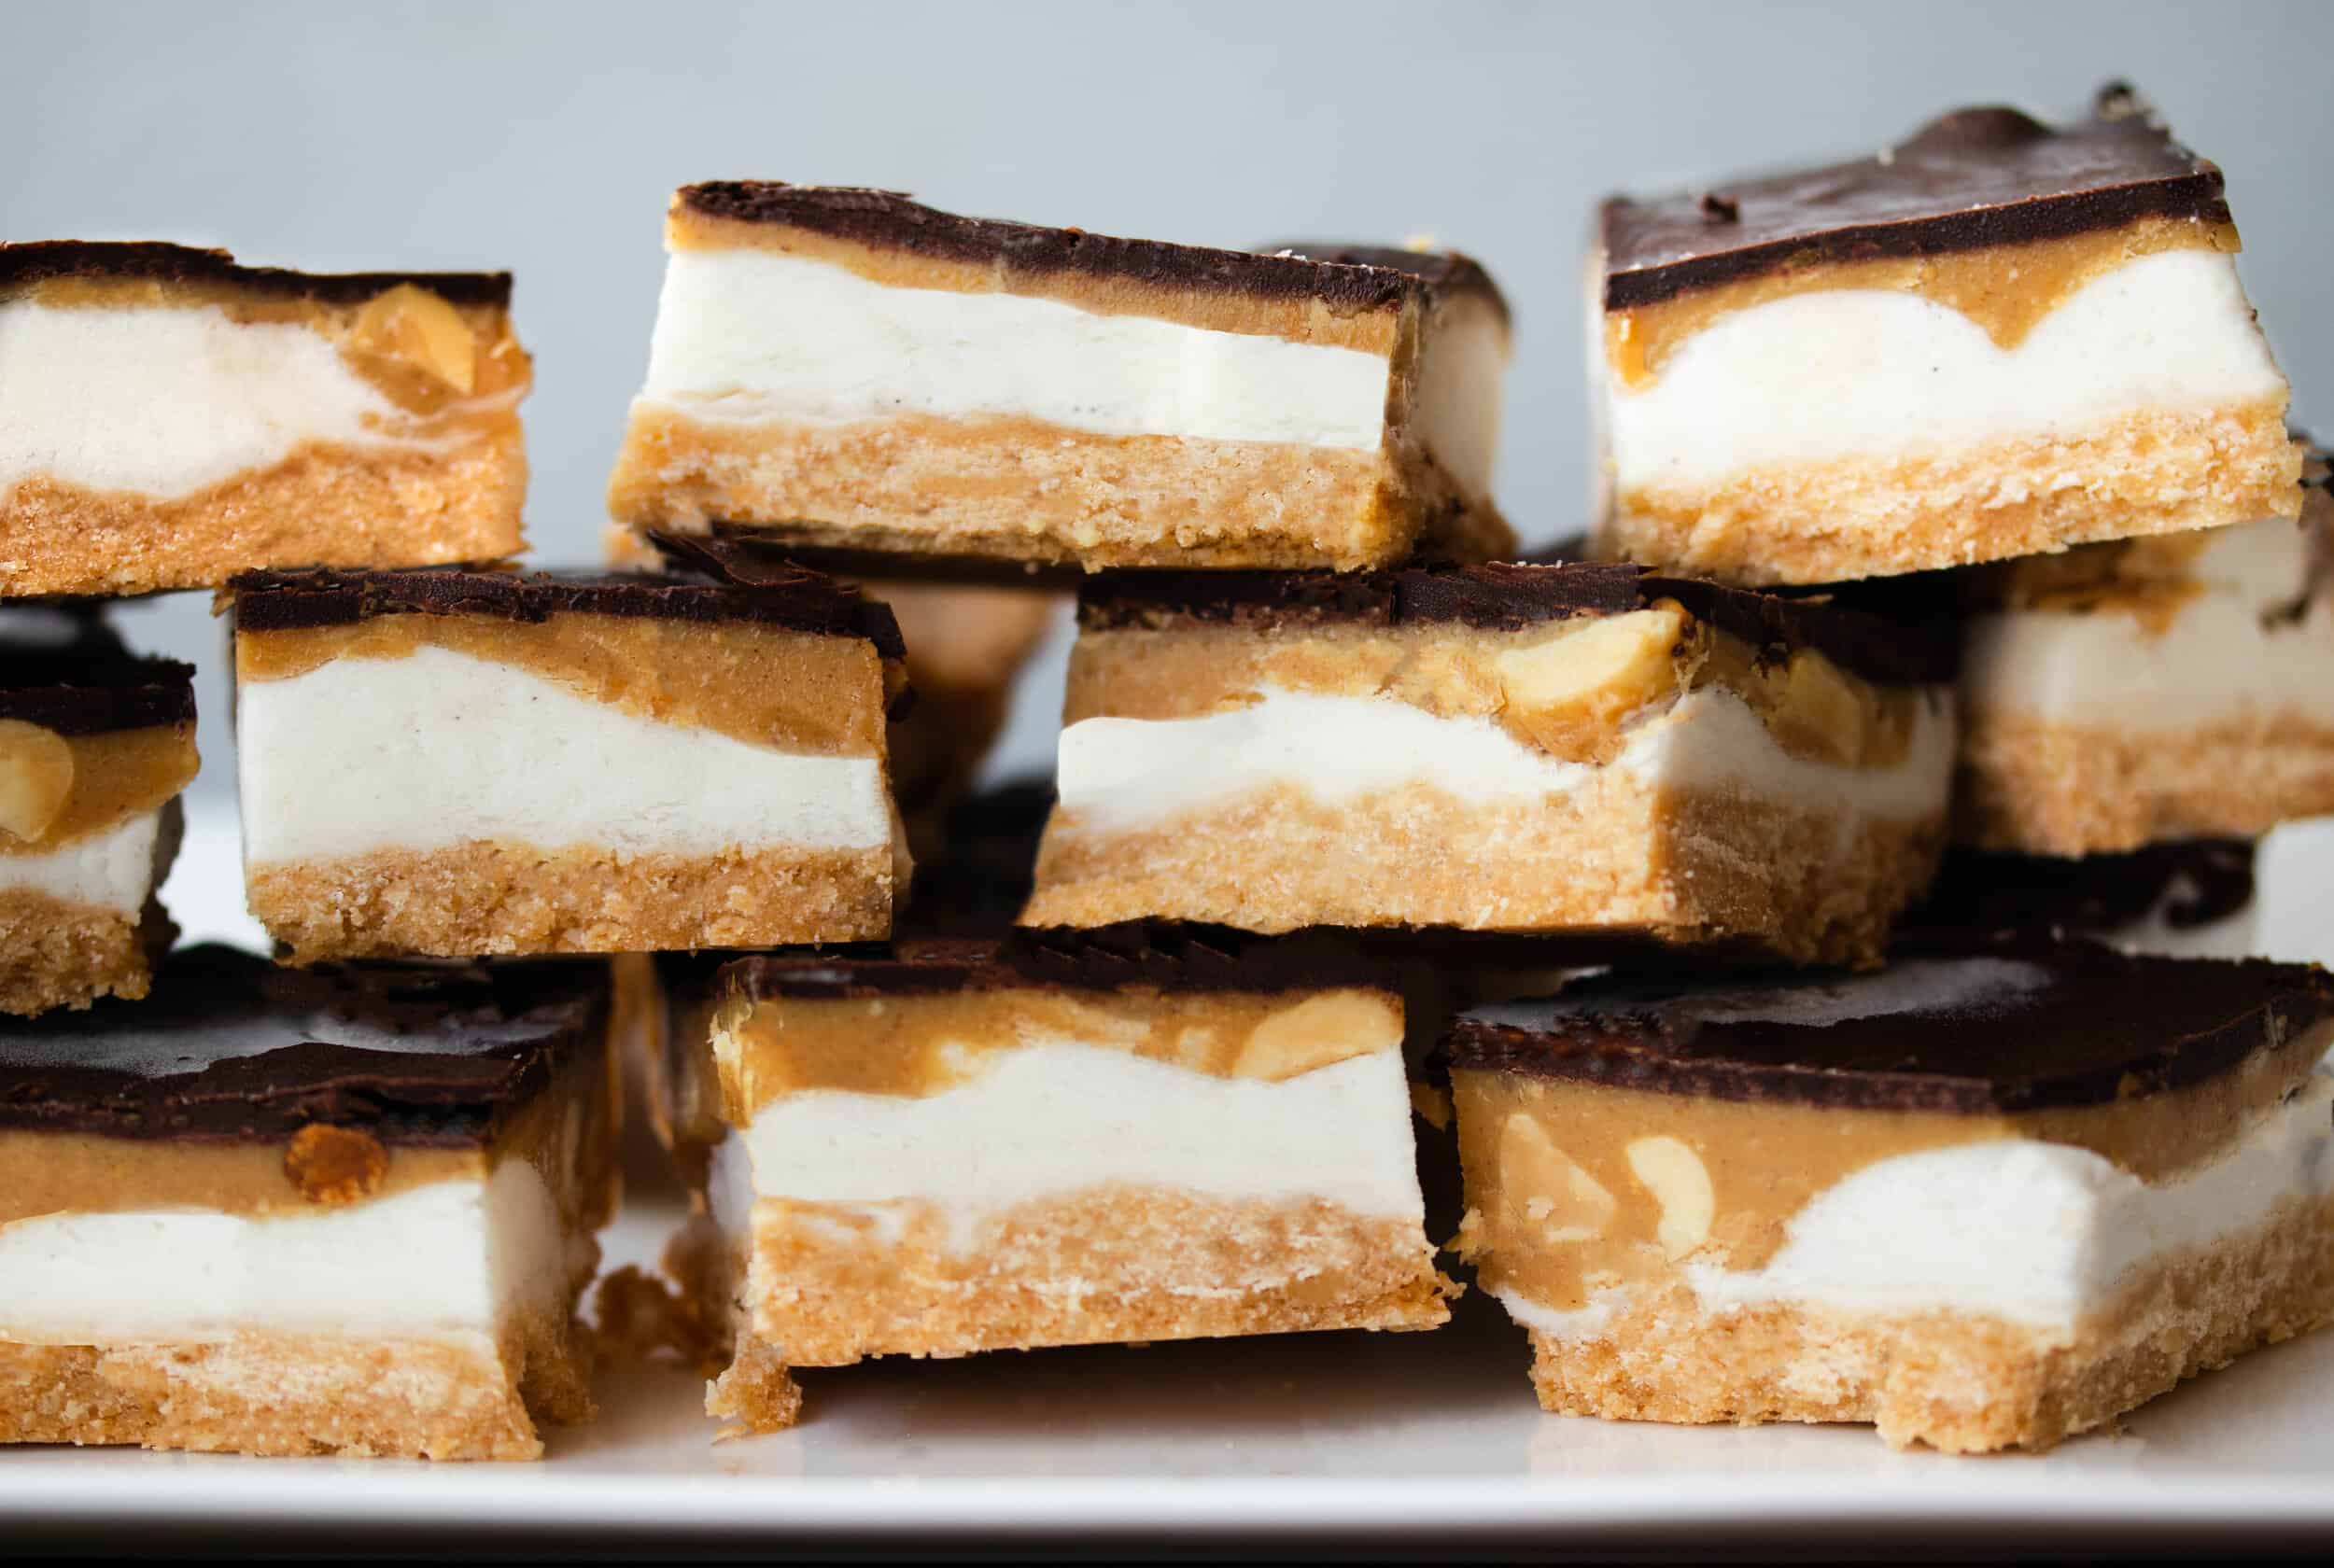
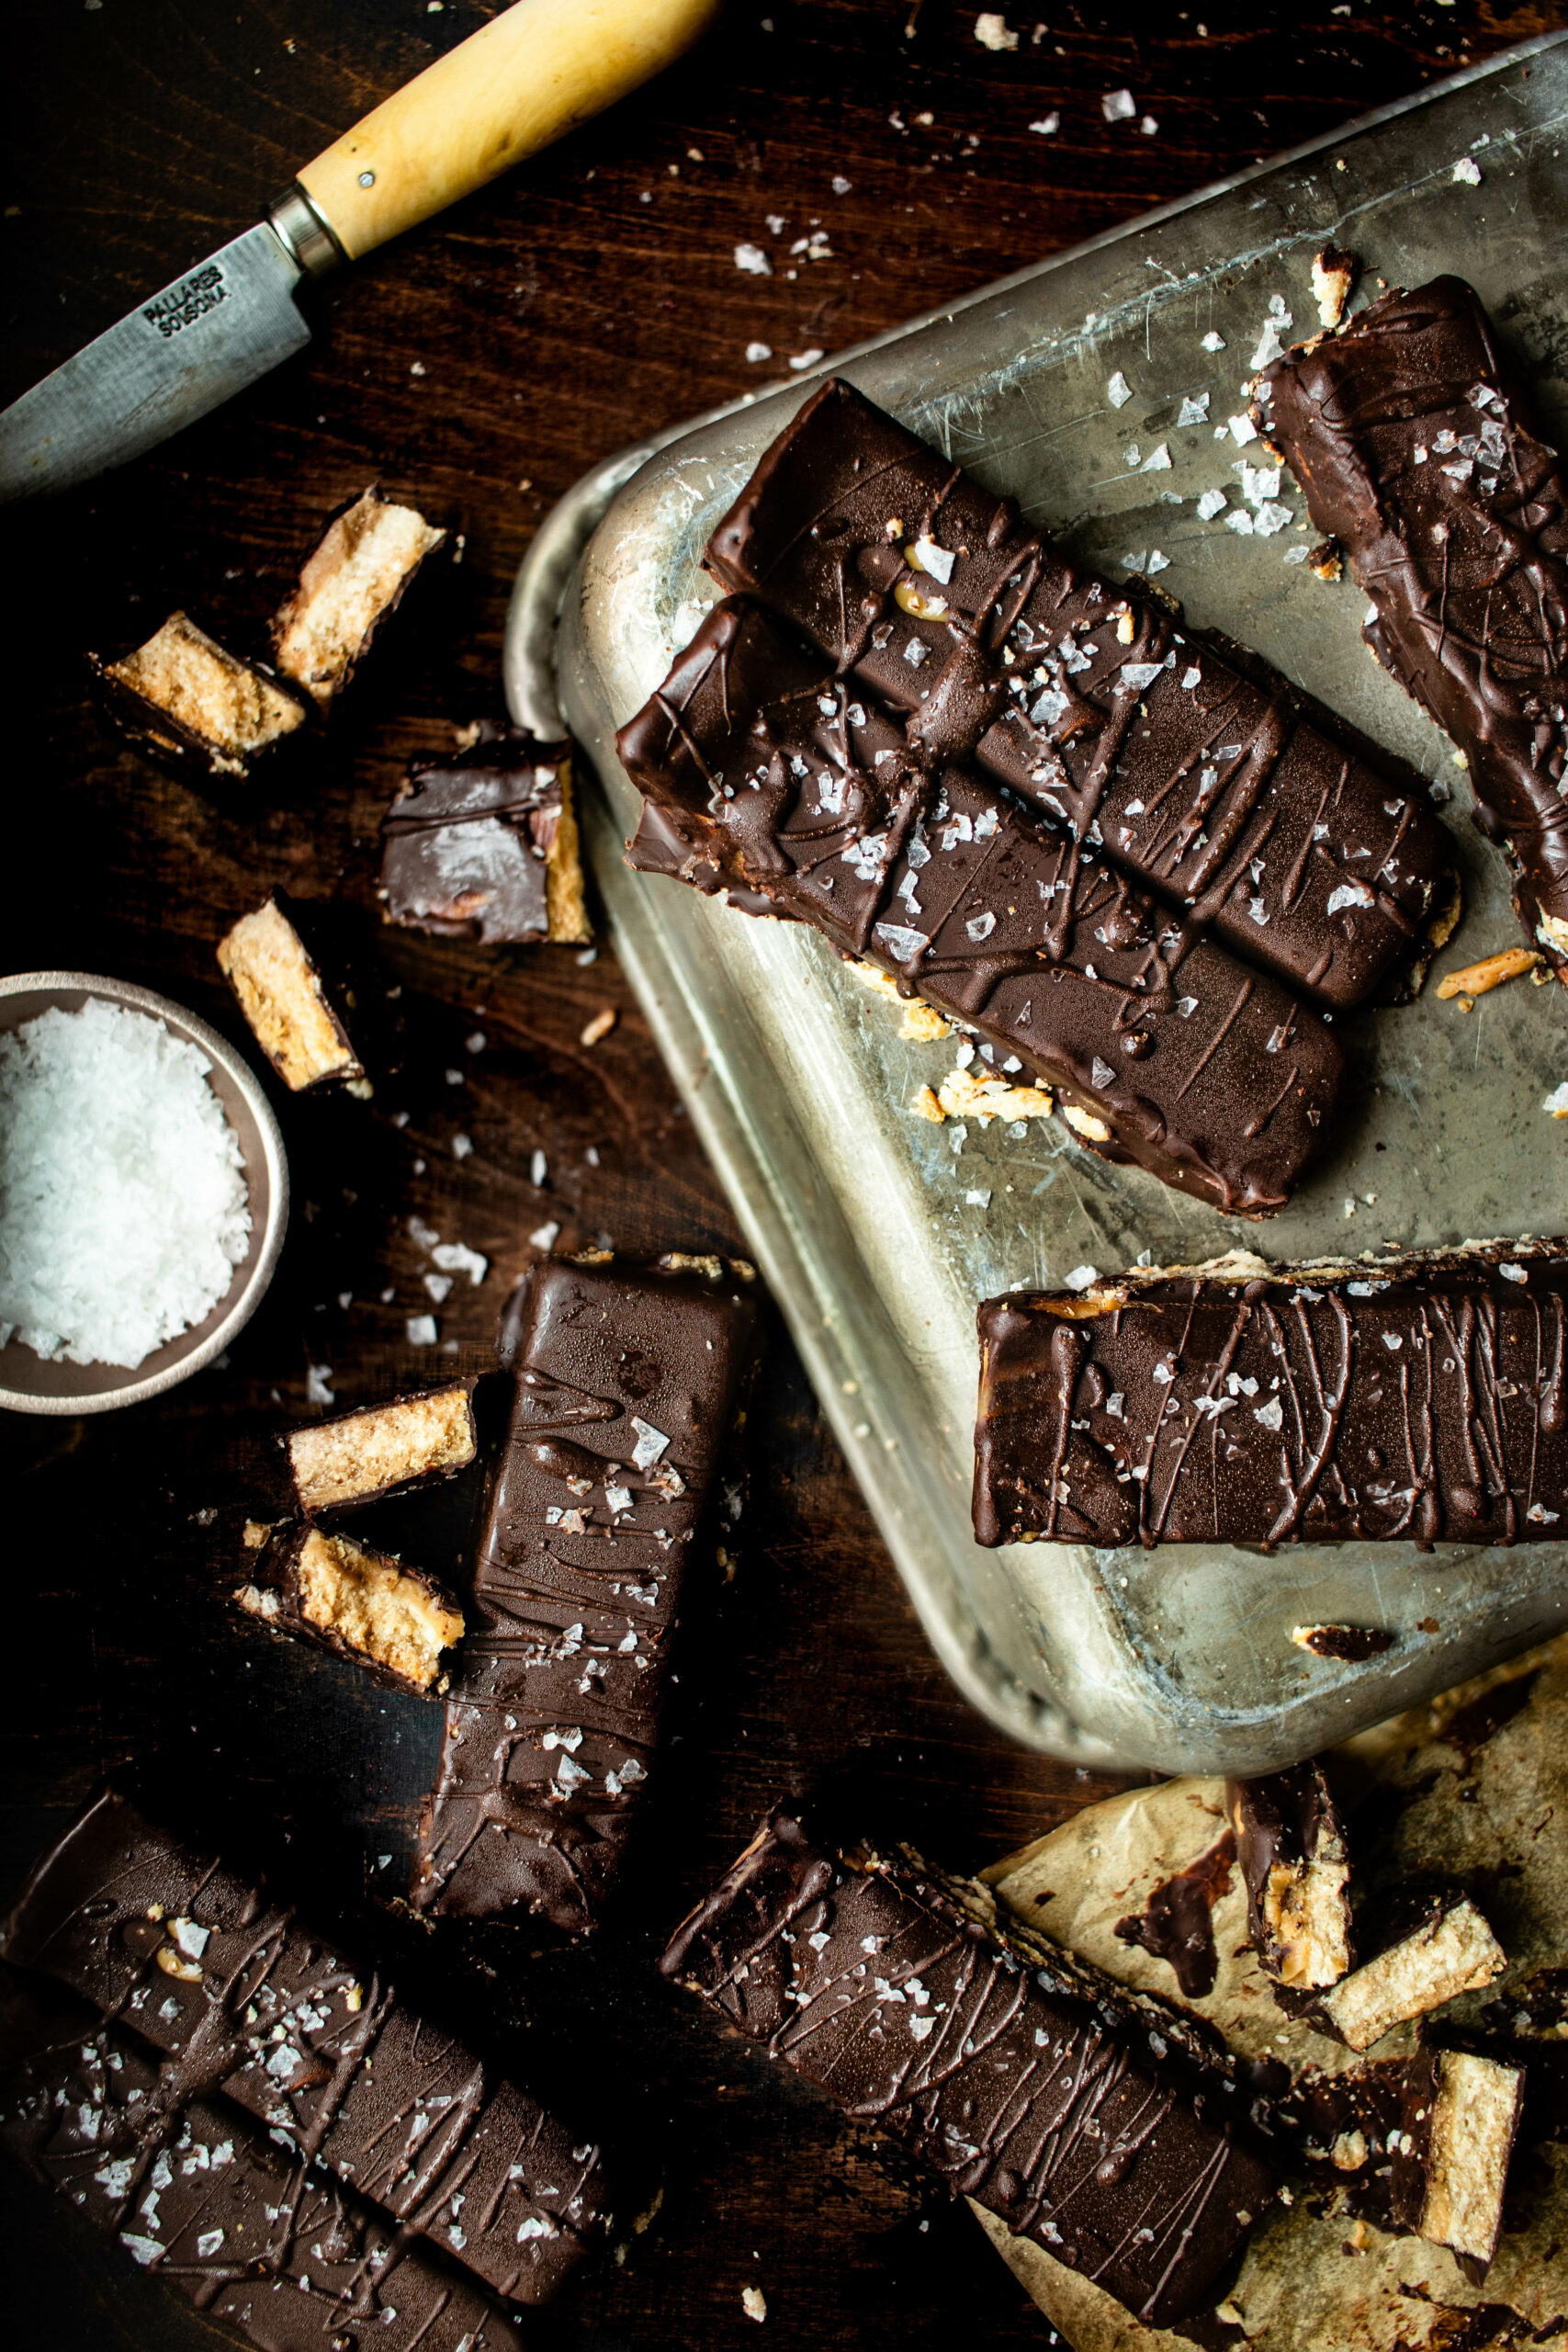
- The Shortbread Layer: This is one of my all-time favorite recipes because it’s SO easy. Literally you put it all in a bowl or stir with a fork! Bonus perks for being grain and gluten-free while still being delicious and full of flavor.
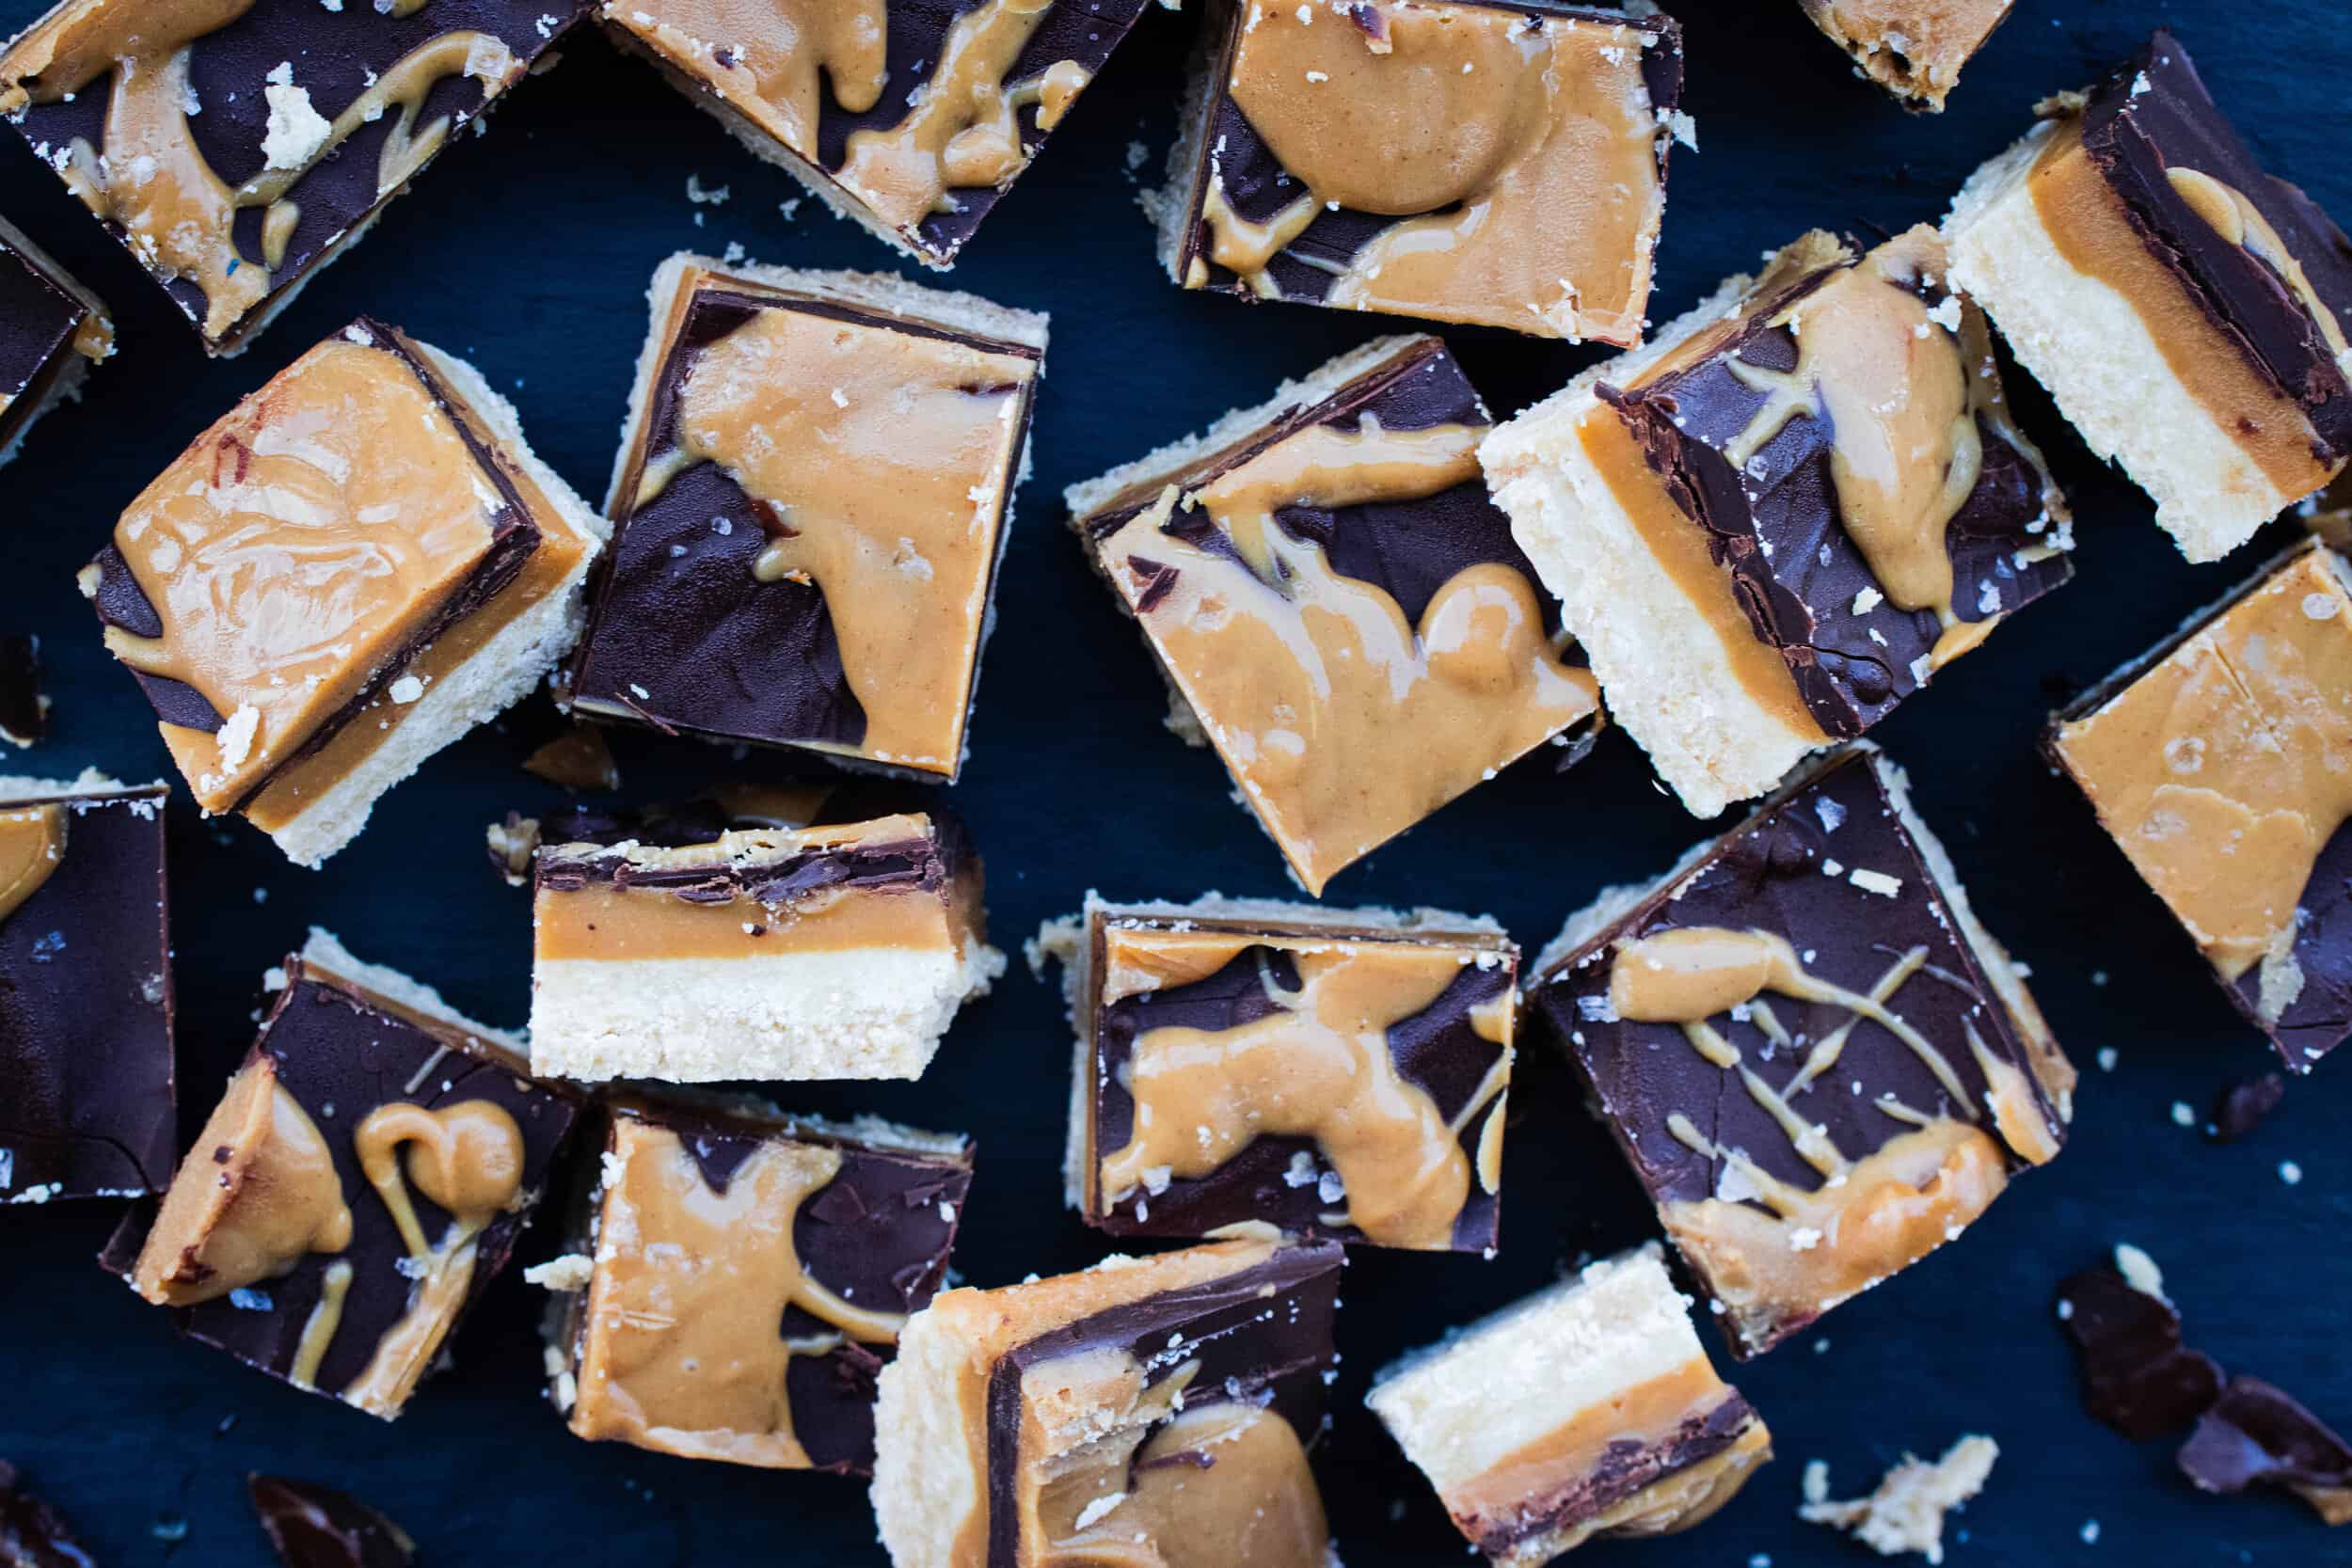
- Peanut Butter Caramel Layer: This has a stronger peanut butter than caramel flavor, just FYI. While I’ve toyed around with the idea of adding in more dates to up the caramel flavor, this would require additional steps of blending, and I personally love how streamlined this process is.
- The Chocolate Layer: The original 2020 post I had used melted chocolate. But since my discovery that cocoa powder is king (after extensive research in my triple layer cookie brownies), I decided to try this with just cocoa powder and coconut oil (and honey for sweetener). It eliminated a step of melting the chocolate and was much easier to handle when dipping the bars into the chocolate.
A few key tips & improvements to this recipe
- 9×9 pan: While delicious, I always struggled with finding the right pan for the original recipe. I would use tin foil in scrappy ways to make it work and finally I got sick of the shenanigans! I’ve now found the perfect amounts to fit either a 9×9 or 8×8 pan.
- Minimize Breakage: When I initially did this recipe, I often would have several pieces that would have some of the layers break off. To prevent this, I do two things:
- After freezing them to set the peanut butter layer, let the bars rest at room temperature a bit when removing them from the freezer. If you notice the peanut butter layer cracking when you try to cut it, wait another few minutes and then try again.
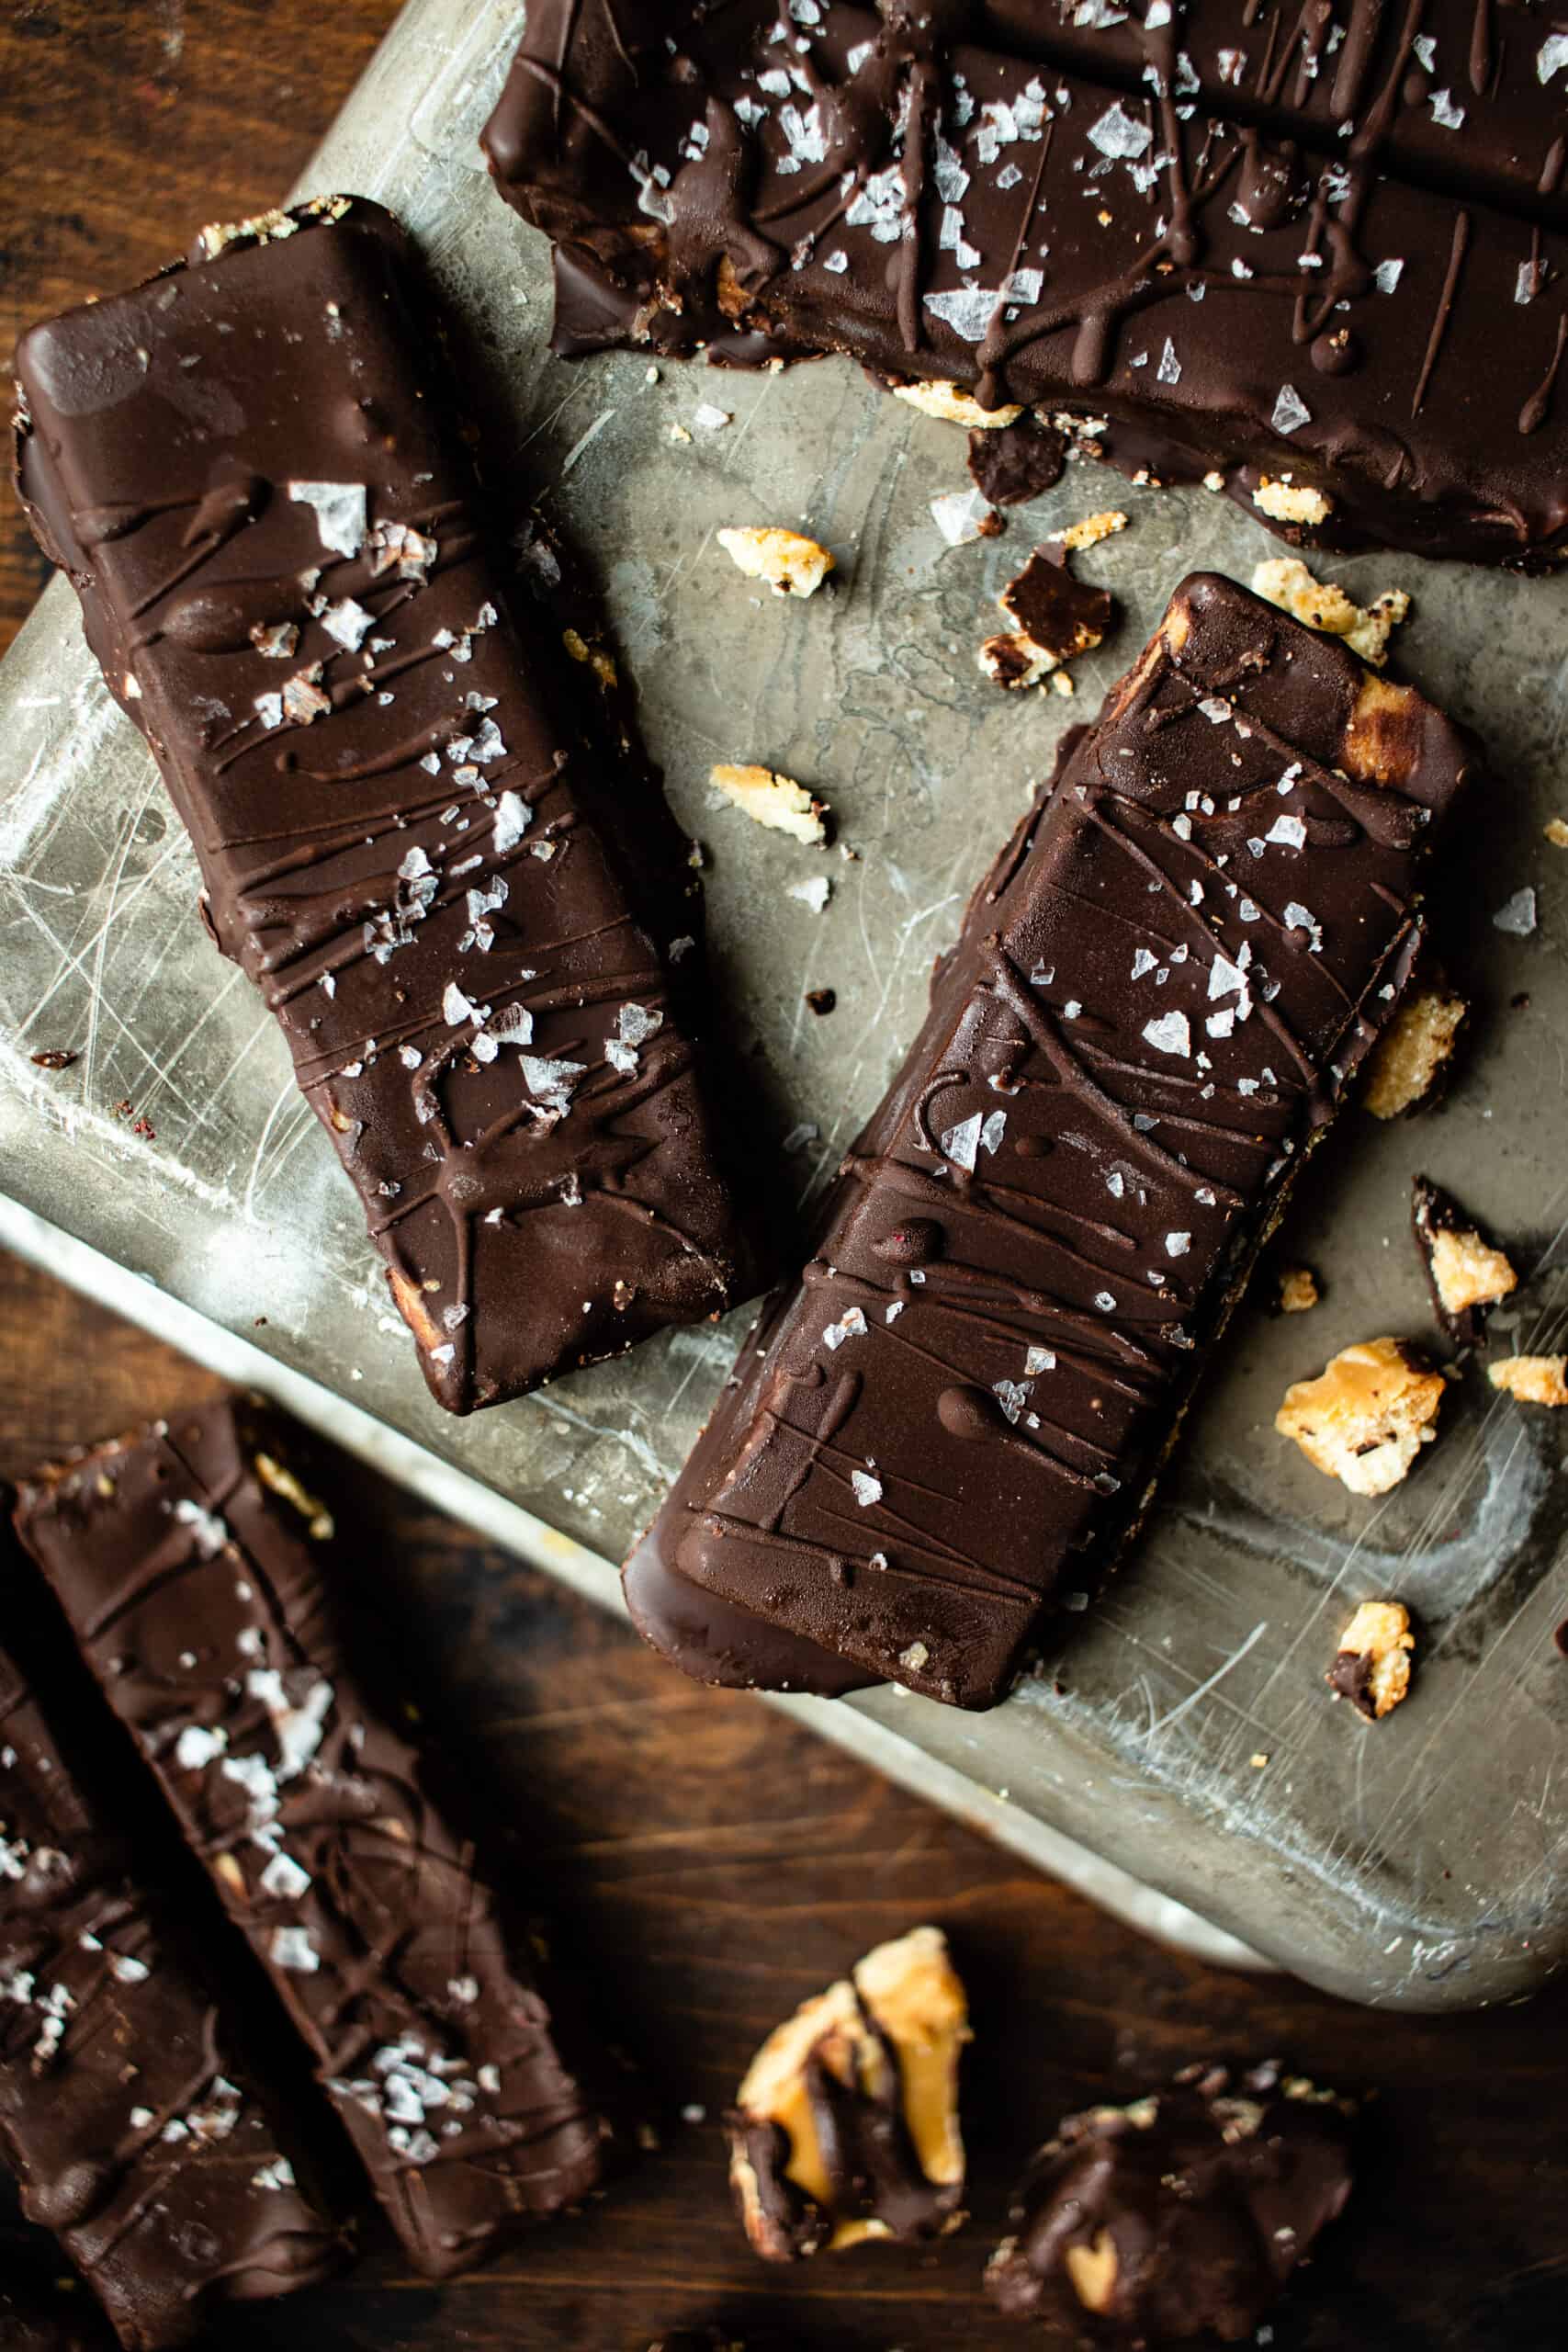
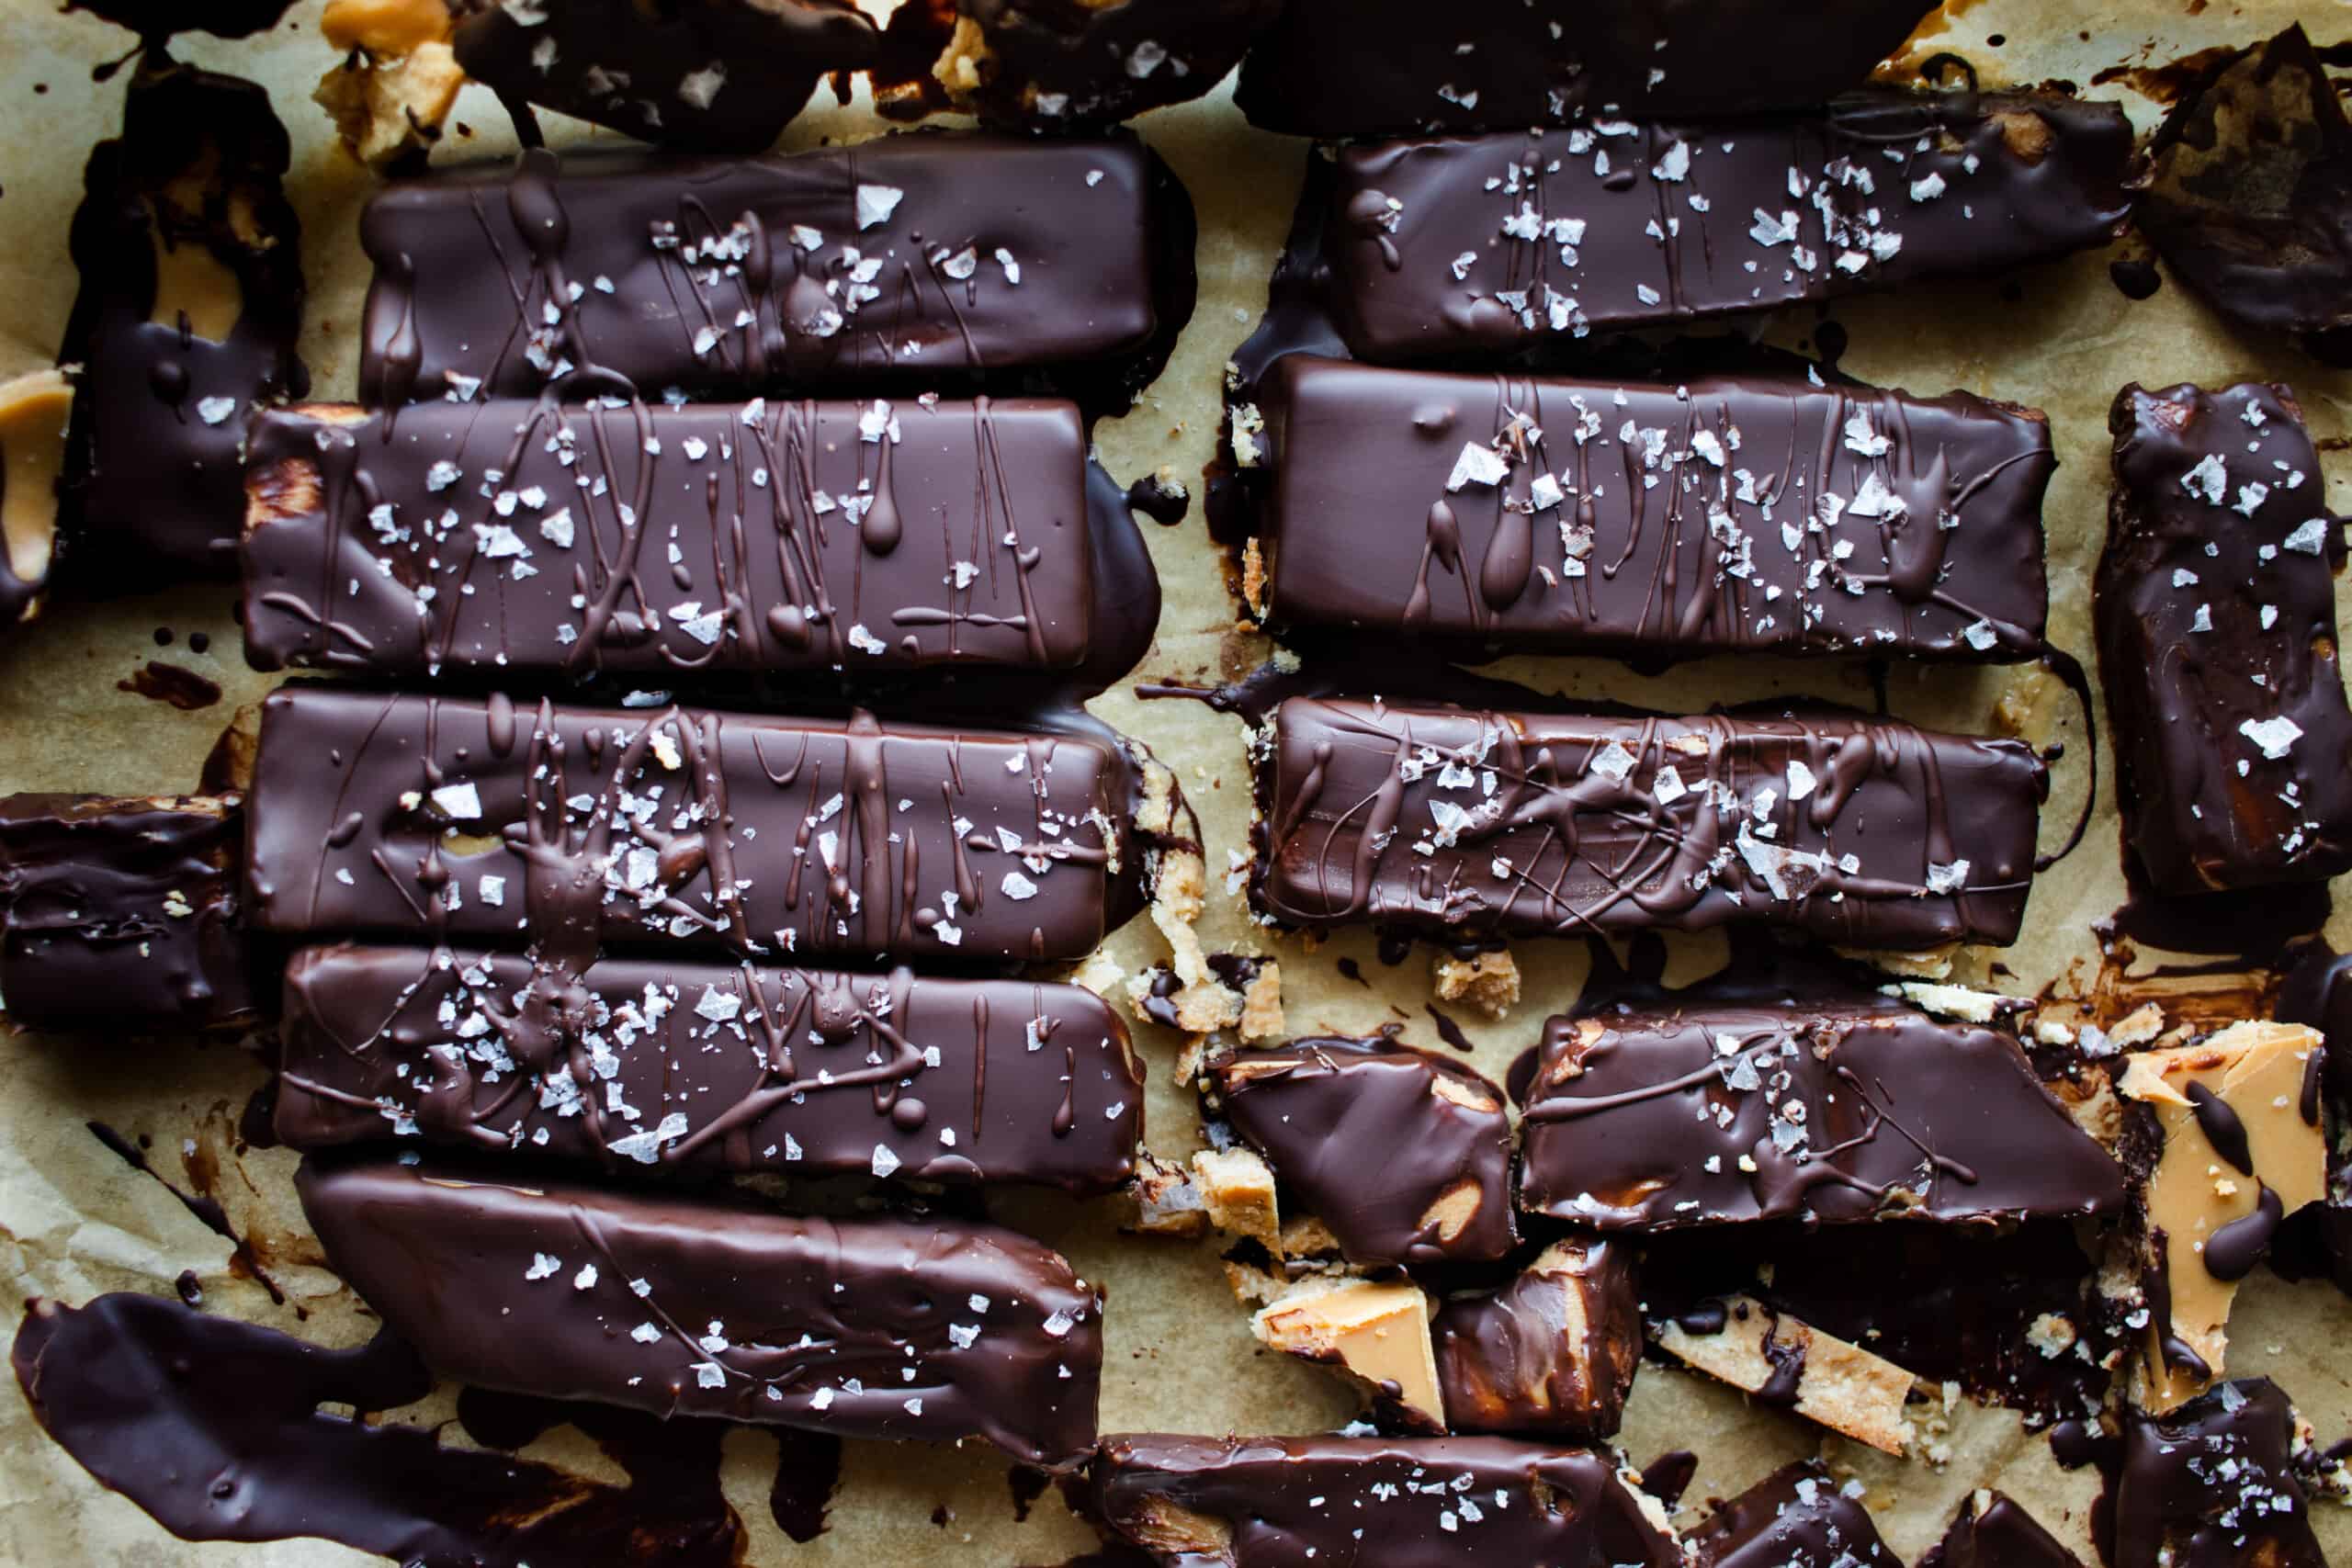
- Cut the bars prior to adding the chocolate. Instead of pouring the chocolate onto the whole 9×9 square pan, cut the bars into squares. Then dip into the chocolate. It takes slightly longer, but you won’t have any issues with the chocolate cracking.
- Storage: The best part about these Healthy Peanut Butter Twix Bars? They can be stored in the freezer. Instead of feeling like I have to rush to enjoy these, freezing them allow you to savor these over a month. And more importantly, there’s NO compromise to flavor.
Healthy Peanut Butter Twix Bars
Shortbread Layer:
- 7/8 cup (96g) blanched almond flour, (Yes, this is a weird amount. Ideally, use a scale, if not, just take a cup and then remove 2 tablespoons from it)
- heaping 3/4 cup (102g) coconut flour
- pinch sea salt
- scant 1/2 cup (95g) coconut oil, ,melted
- 1/4 cup – 1/3 cup (80g- 120g) honey
- 1/4 teaspoon kosher salt, or 1/8 teaspoon sea salt
Peanut Butter Caramel Layer:
- 3/4 cup (210g) peanut butter or other nut butter of your choice
- 3 tablespoons (42g) coconut oil, , melted
- 1/2 teaspoon vanilla
- 1/4 teaspoon kosher salt, or 1/8 teaspoon sea salt
- 1/4 cup (80g) maple syrup or honey, If you’re not watching sugar super closely or making this for others, this is the option I’d do.However, you can try using coconut sugar stevia, or monkfruit here. See below for more on this **.
Chocolate Layer:
- 6 tablespoons (36g) cocoa powder
- 3 tablespoons (42g) coconut oil, , melted
- 2.5 tablespoons (50g) honey
- optional: flaky sea salt for topping
Shortbread Layer:
- Preheat oven to 350.
- In a large bowl, combine flours and salt. Stir to combine. Pour in coconut oil and honey and “whisk” using a small fork until it is thoroughly mixed. It should be fairly oily to the touch.
- Using your hands, press mixture into bottom of 8’’ or 9’’ square pan that is lined with parchment paper. Bake for 12-14 min until light golden brown. Let cool before adding next layer.
Peanut Butter Caramel Layer:
- NOTE: To thoroughly mix the nut butter with all the other ingredients, the coconut butter needs to be liquified. You can liquify it using the microwave or on a stovetop. I personally like the microwave because it is easier and I can use the same bowl I used for the first layer (less cleaning). About 20-30 seconds usually does the trick.
- Add all ingredients (coconut oil, peanut butter, vanilla, salt, and maple syrup/honey) into bowl. Whisk to combine using as a small fork until smooth.
- Pour mixture over shortbread. Tilt the pan to make sure it is evenly spread out.
- Place in freezer for this to slightly harden, at least 60 minutes, up to 6 hours.
Chocolate Layer:
- Combine cocoa powder, coconut oil, salt, and honey in a small bowl. Taste and adjust sweetener as you see fit (you can always add more if you prefer it sweeter).
- Remove bars from freezer. Let sit at room temperature for about ten minutes- this will help prevent any cracking of the peanut butter caramel layer when you try to cut the bars.
- Cut bars into shape of your choice- you can do a small square or rectangle. Dip the top part of the bar in the chocolate mixture and then place on a sheet to let set. Sprinkle flaky sea salt on top if desired- BEFORE it sets!
Storage:
- Store bars in freezer for up to 2 months.
These were amazing! Although I intended to freeze some for later, they did not quite make it that far. I would have eaten each layer by itself, but then all three together was so decadent. It is a sweet treat that I don’t feel terrible about and was easy to put together with ingredients I already had. It was just what I needed 🙂
So glad you liked them Sarah!!
These have become a family favorite! Perfect dessert for Gluten free family members and for those of us with a sweet tooth! I have kept them In the freezer as suggested and it has been great to be able to grab just one after dinner and not feel guilty over having dessert. Very satisfying for a sweet tooth craving and soooooo delicious!
Thanks for sharing and happy to hear that the gluten free family members liked them!
Okay this is a yum af recipe with sugar free options. My favorite part of this recipe? The clean up is minimal if you follow her directions. 5 stars for this recipe out of 5 obvs!
Yay! So glad you enjoyed this recipe- and the minimal clean up is key!